House-painting has always been something you either have a go at yourself, or fork out a few thousand ringgit to let others do it for you. However, with the increase in prices of most items after the Goods and Service Tax (GST) implemented this year, many people have resorted to do-it-yourself (DIY) home projects – from light fixtures to landscaping – in order to save cost. Giving your house a new coat of paint is fairly doable, but it does require a little more time and physical effort to accomplish.
Before you pull on your gloves and pick up that paint brush (or roller), take a peep at some of these tips to help you ease the painting process.
#1 – Estimate your budget
Begin by estimating your painting budget. This involves calculating the:
- number of rooms/walls/ceilings to be painted
- number of doors/windows/railings/grilles to be painted
- amount of paint required
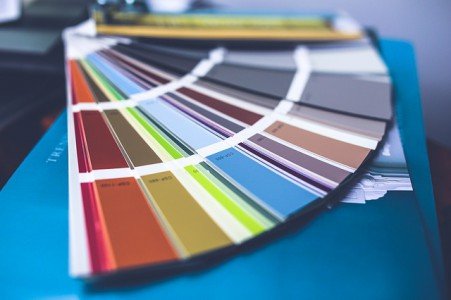
- colours, textures or finishes for different surfaces
- cost of painting tools e.g. brushes, rollers, gloves, trays, masking tape, plastic sheets, scrapers, thinner, fillers, extendable pole, a ladder, etc
Before starting the paintwork, take some time to compare the prices of different paint brands and finishes so that you have an approximate budget in mind. Allow an extra RM200 – RM300 in case you go over budget when buying painting supplies.
#2 – Allocate your time
Painting your house or even a single room can be quite time-consuming, so plan your schedule wisely, especially if you are working office hours on weekdays. This leaves you with only a few hours after work each day and weekends free, therefore proper time management is vital to ensure you complete your painting project on time and doesn’t affect your work.
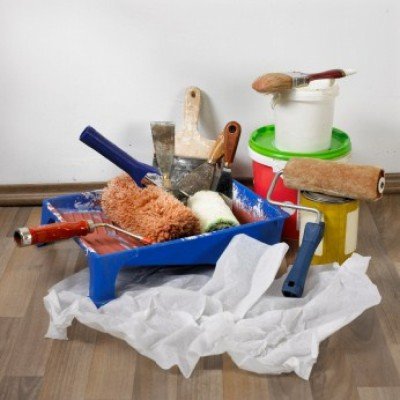
Photo from buildipedia.com
#3 – Be prepared
…to buy a lot of miscellaneous painting tools, which can easily add up, resulting in extra costs. Besides the basic items like rollers, brushes, paint trays, and gloves, you will also need to use a lot of masking tape to tape off edges and trimmings, as well as plastic sheets to cover your furniture and floors, extendable poles to paint high walls or ceilings, scrapers and fillers to prep your paint surfaces, thinner to remove stains, sandpaper to smoothen walls, face masks and goggles, and other assorted items. You should also set aside some old towels – cut into pieces – to use as rags, and one or two sets of old clothing to wear while painting which can be thrown away once everything is done.
#4 – Get down and dirty
If you are painting a new house without furniture and few fixtures, you only need to cover the floor with plastic sheets and mask trimmings, edges and doorknobs. For existing homes, however, you will most likely have to do a bit more physical work, such as moving around heavy furniture, dusting and sweeping long-forgotten and hard-to-reach areas under cupboards (which may contain unsavoury items accumulated over the years), and working in confined spaces.
#5 – Clear a workspace
Likewise, if you are painting a new house, there should be plenty of space for you to set aside a corner to place your buckets of paint, brushes, rollers, trays, and other painting tools. It is best to clear a (preferably large) space to place your painting materials and tools, making it easier to find and take the necessary items during the painting process. Make sure to cover the area with newspaper or a plastic sheet to protect the floor from wet spots or paint stains.
#6 – Prep painting surfaces
Prep the surfaces before painting to ensure a smooth finish. Prepping work includes cleaning dirty walls, scraping off old and flaking paint, using sandpaper to smoothen rough wall surfaces, and using fillers to fill up any holes in the walls. A clean surface will not only help the paint to adhere better, but also ensures that your paint job lasts longer.
#7 – The “big to small” rule
Ah, we finally get to the painting part! The rule of thumb is to start with the large surfaces (walls, ceilings), followed by doors, and finish up with the small areas (windows, grilles, skirting). When painting the large surfaces, begin with the corners and edges that are more difficult to paint, then you can go over them safely with a roller or large brush.
 #8 – Paint gets everywhere
And we mean everywhere. Be it tiny splatters from rolling too vigorously, drips from paint brushes, or an accidental spill, paint can and will get on any surface even if you’re careful, so prevent getting a paint stain on your beloved antique dresser or brand new sofa by covering every available inch. This can be done by draping a plastic sheet over large furniture and floors, taping newspaper to awkward edges, and masking plug points, switches, doorknobs, window frames and other small but non-removable items.
 #9 – Wash up well
As mentioned in #8, paint will get everywhere when you start painting (even in places you didn’t know paint could get to), so remember to take a good long shower or bath after you finish painting for the day. Even if you’re wearing gloves, face mask and goggles, paint can still get all over your hair, hands, legs and even face, so make sure to clean up and scrub off paint residue from your body. Besides yourself, it’s also important to wash your brushes and rollers thoroughly at the end of the day. This will extend their lifespan, thus reducing your cost because you won’t have to buy so many brushes and rollers.
#10 – Most importantly… Have fun!
DIY painting your own house may be tiring, but it’s also fun and rewarding because you get to see and enjoy the fruits of your labour afterwards. Painting your house is no fun when doing it alone, so gather family members or friends to help out (which can also speed things up), draw silly patterns on the walls (but remember to paint over those!) and turn on some cheerful music so that it won’t be such a dreary job. Just remember to unwind – and reward everyone for their efforts – with a good dinner. 😉
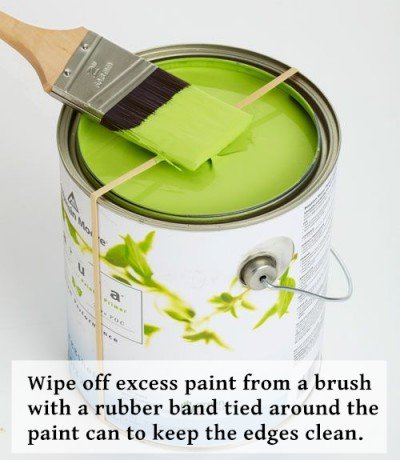
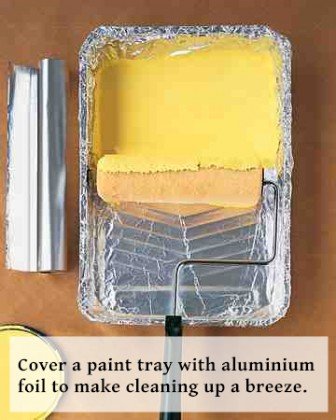
Bonus: Paint hacks with pictures!